

Building in the Sims 4 is one of my favourite parts of the game. I can spend hours and hours building away without even playing with the Sims at all, I love it. I’ve even done an intricate Sims 4 half-level stairs tutorial which took some thinking to work out!
When I first started I kind of wish I had a build mode tutorial to watch or read to help me out, so I decided to make my own! I hope this build guide helps you out with your Sims 4 creations.
Sims 4 Build Mode Controls
First, it might be worthwhile looking at the sims 4 hotkeys guide we did for more info on hotkeys and what they can achieve. The rest of the controls I will touch on later in this guide.
Sims 4 How To Build
Great, we know all the necessary keys to be able to get everything done. Now let’s take a look at how to build in the Sims 4. We’ll first take a look at the screen UI (user interface) and then see which sections/panels do what.
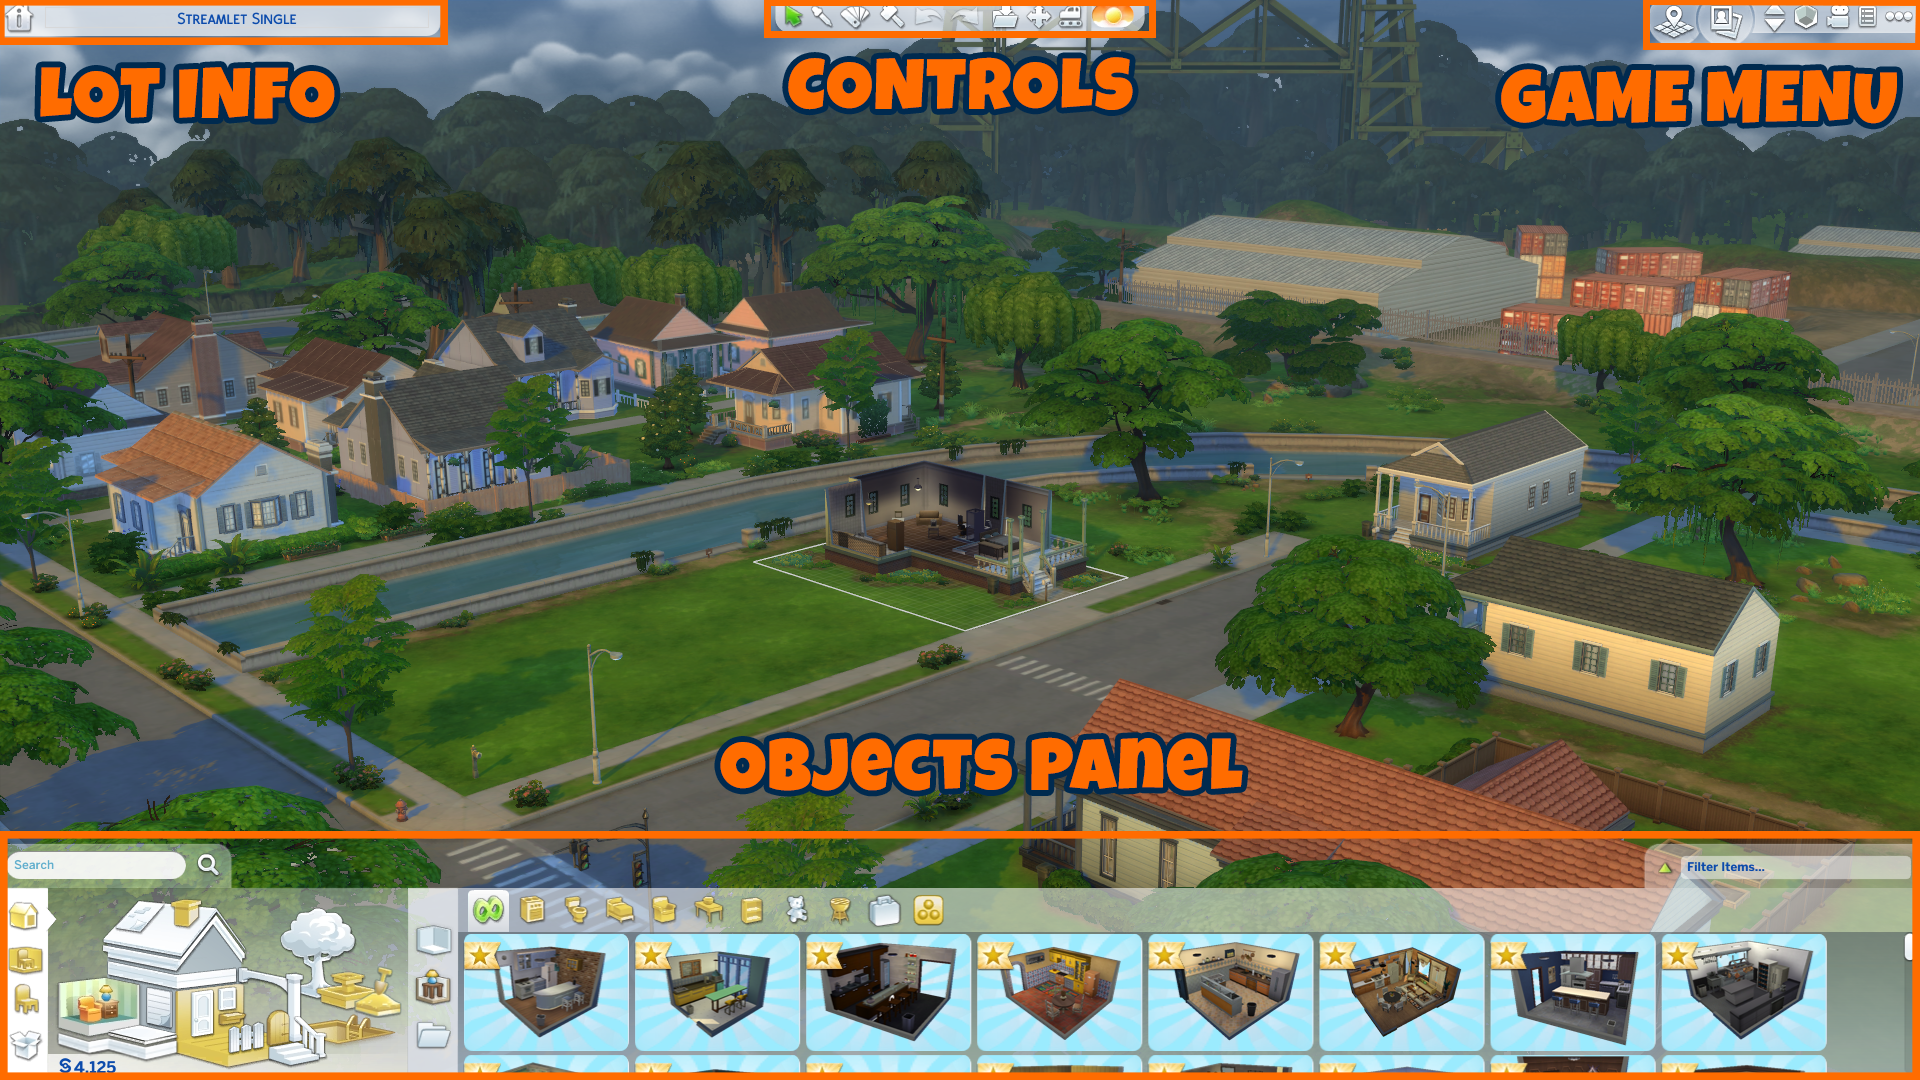
As you can see above I have pointed out the main areas or panels of the game when building.
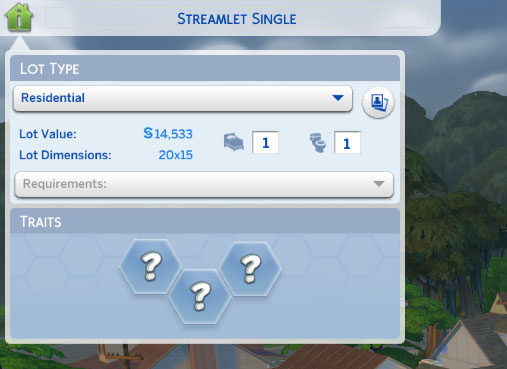
Sims 4 Build Mode Lot Info
In the lot info section, you can find all sorts of useful information regarding the current lot you are building on. The lot type section includes a dropdown for what type of lot it is. Lot dimensions, for example, 20 x 15 tiles. Lot value, which includes all of the placed objects plus the initial cost of the lot.
Note: The tiny living expansion also includes a dropdown for a tiny home. This then lets you select the requirements dropdown and work towards a micro, tiny or small home. This gives you additional benefits.
Sims 4 Build Mode Controls
The next section in the top middle of the screen is the basic controls. These controls allow you to interact with objects. You can move objects, copy objects, change their design and even destroy objects.

- Arrow (Select Tool): This is your main tool, it allows you to select objects. Once selected they can be moved, rotated, or changed depending on the object type.
- Pipette (Eyedropper Tool): This will copy an object so that you can place the exact same one (including colour) down again.
- Swatches (Design Tool):
- Hammer (Sledgehammer Tool): This will allow you to click on individual objects to delete them.
- Left arrow (Undo Tool): This will undo your previous action.
- Right arrow (Redo Tool): This will redo your previous action.
- Folder with down arrow (Save To My Library Tool): This will save your current build to your library, which can then be uploaded to the gallery or used again somewhere else.
- Cross arrows (Move Lot & House Tool): The move lot tool allows you to move your whole house around the lot.
- Bulldozer (Bulldoze Tool): This tool will bulldoze the whole lot, so be careful!
- Sun/Night (Time/Light Tool): This allows you to change through each of the times available in The Sims 4, which also changes the current light level.
Whew, that was a lot of information, but don’t worry it will become second nature to you in no time. One thing to note is that most of the time you will be using only 2-3 of these tools regularly. The last few (except for the day/time tool) are only used every so often.
The Sims 4 Game Menu
I’ll keep this section short, as it is the same as the live mode, but there are a couple of key controls you will use all the time here.

The up and down arrows allow you to jump between floors in your build. This is really useful as you will constantly be jumping between floors to finish your build.
An icon that looks sort of cube, is the Walls View.
- Cutaway View (Walls): This only shows the walls at the back of the build.
- Up View (Walls): This will show all walls, which blocks your view, but is useful for seeing how your complete build looks.
- Down View (Walls): This is the opposite of the walls up view, it shows no walls so that you have no walls blocking your view.
The final icon is the camera icon. Clicking this will bring up a small camera panel which can be used to move your camera around. I highly recommend using keys instead of this panel as it’s very time-consuming. Use your mouse scroll wheel up and down to zoom in and out. Use right-click to pan your view across the screen. Finally holding down your middle mouse button (wheel) allows you to rotate your view. This is really useful and I recommend learning how to use it.

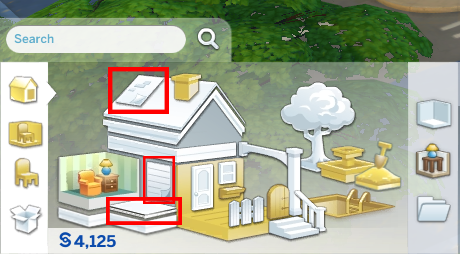
Sims 4 Build Mode Objects Panel
This panel is your main panel when building. It allows you to find any object you require and place it down. Each object can have certain attributes that can be altered once placed, for example, walls and roofs.
I’m going to break down this panel into 2 main sections. The first section which includes the icons on the left and the smaller 3D objects that make up a room. Then the additional icons panel which doesn’t always appear.
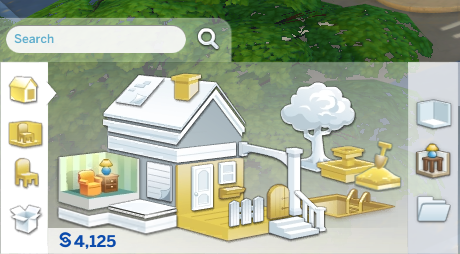
You can think of this as your search. It gives you categories to click through, along with different ways to view objects, for example by function or by room. The different views achieve the same result, it just makes it easier for you to find items.
The next bit is where you will see 3D outlined objects. You can click them to bring up those items on the right-hand side.
This the primary way of finding objects to place in your lot. Once you have clicked one of the 3D outlined objects you will then be given a load of objects in the right-hand side. This is the second section of the objects panel.

Section 2 of the Build Mode UI is where you will find the individual objects after searching for them. You might find the perfect oven for your house! Once you have found the object you are looking for, you can click it and place it in the lot.
Perfect, so we’ve covered all of the basic controls and panels you might see in the Sims 4 build mode, next we’ll take a look at building a very very basic house. I’ve emphasised the very because it only includes a sofa, table, TV, lights, windows a door and a roof. That is all you need to know to get building though.
Sims 4 Example House Build
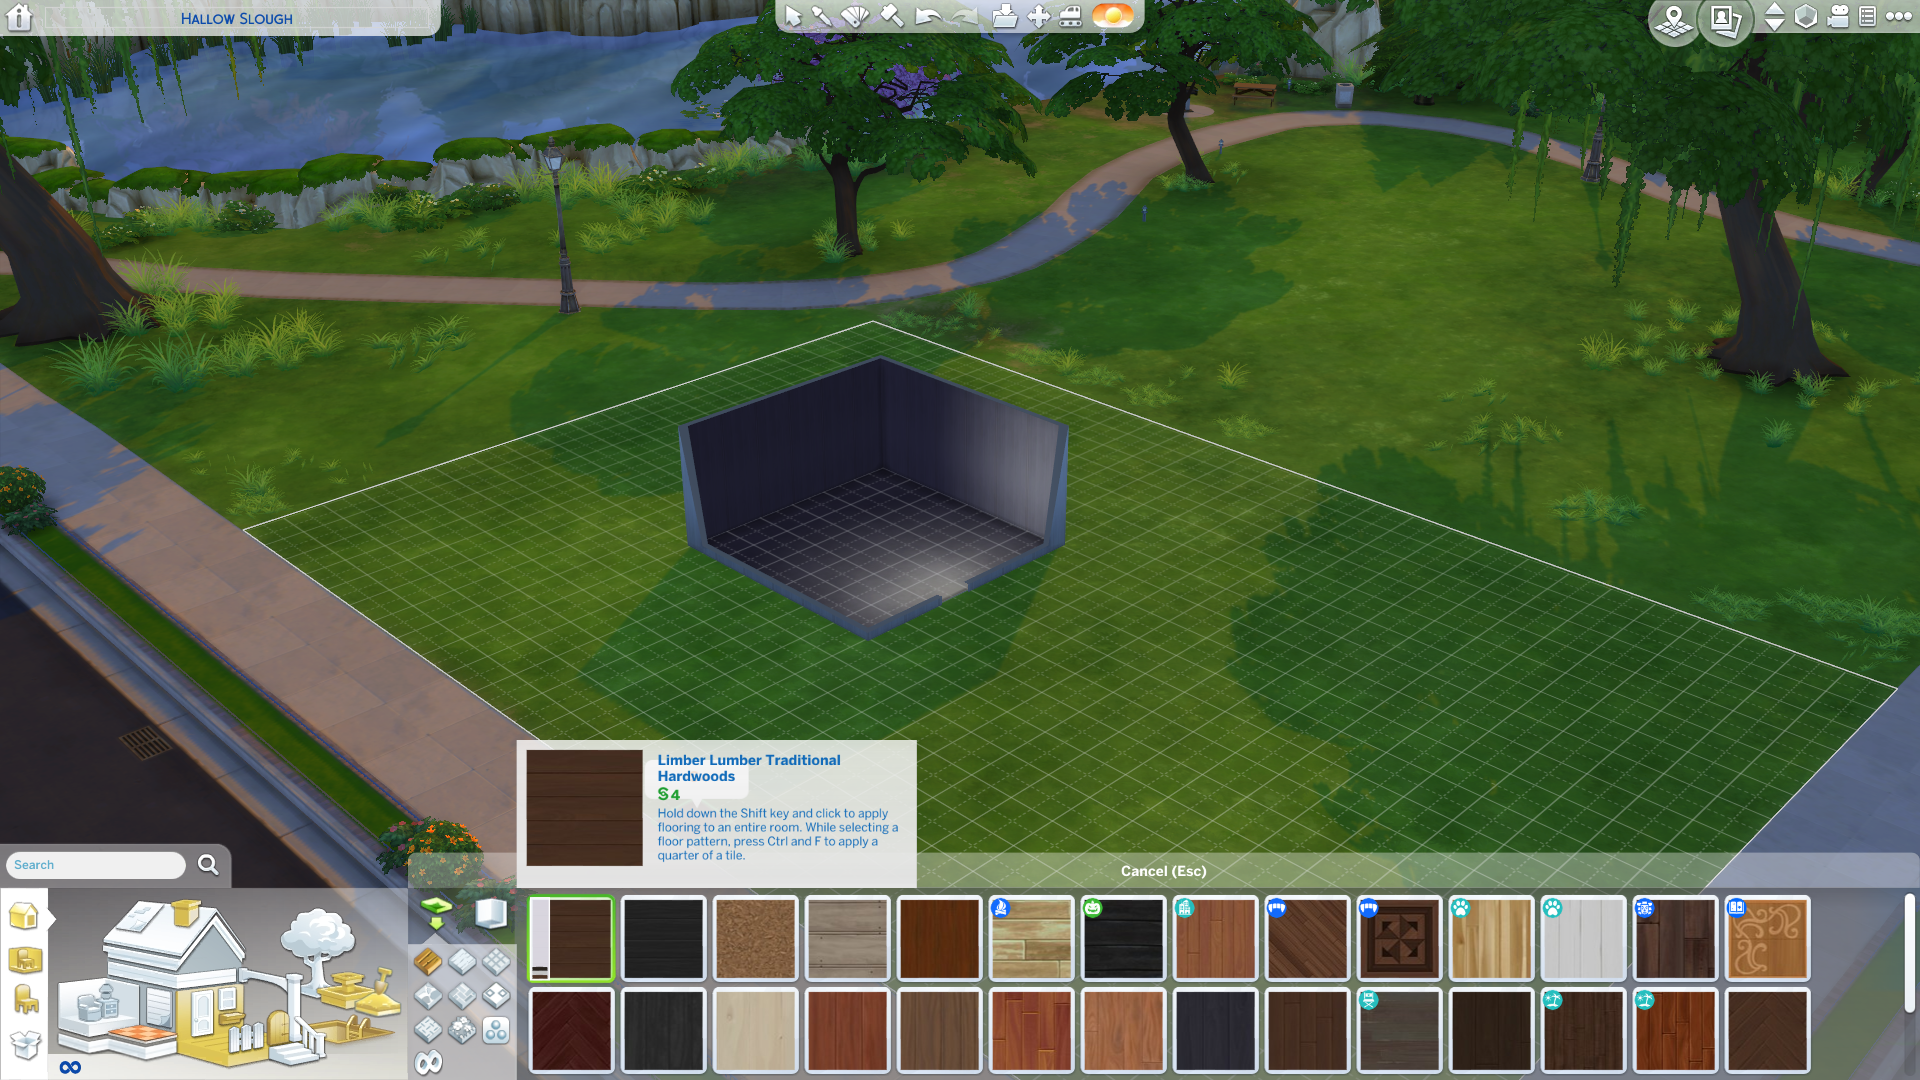
Step 1: Walls
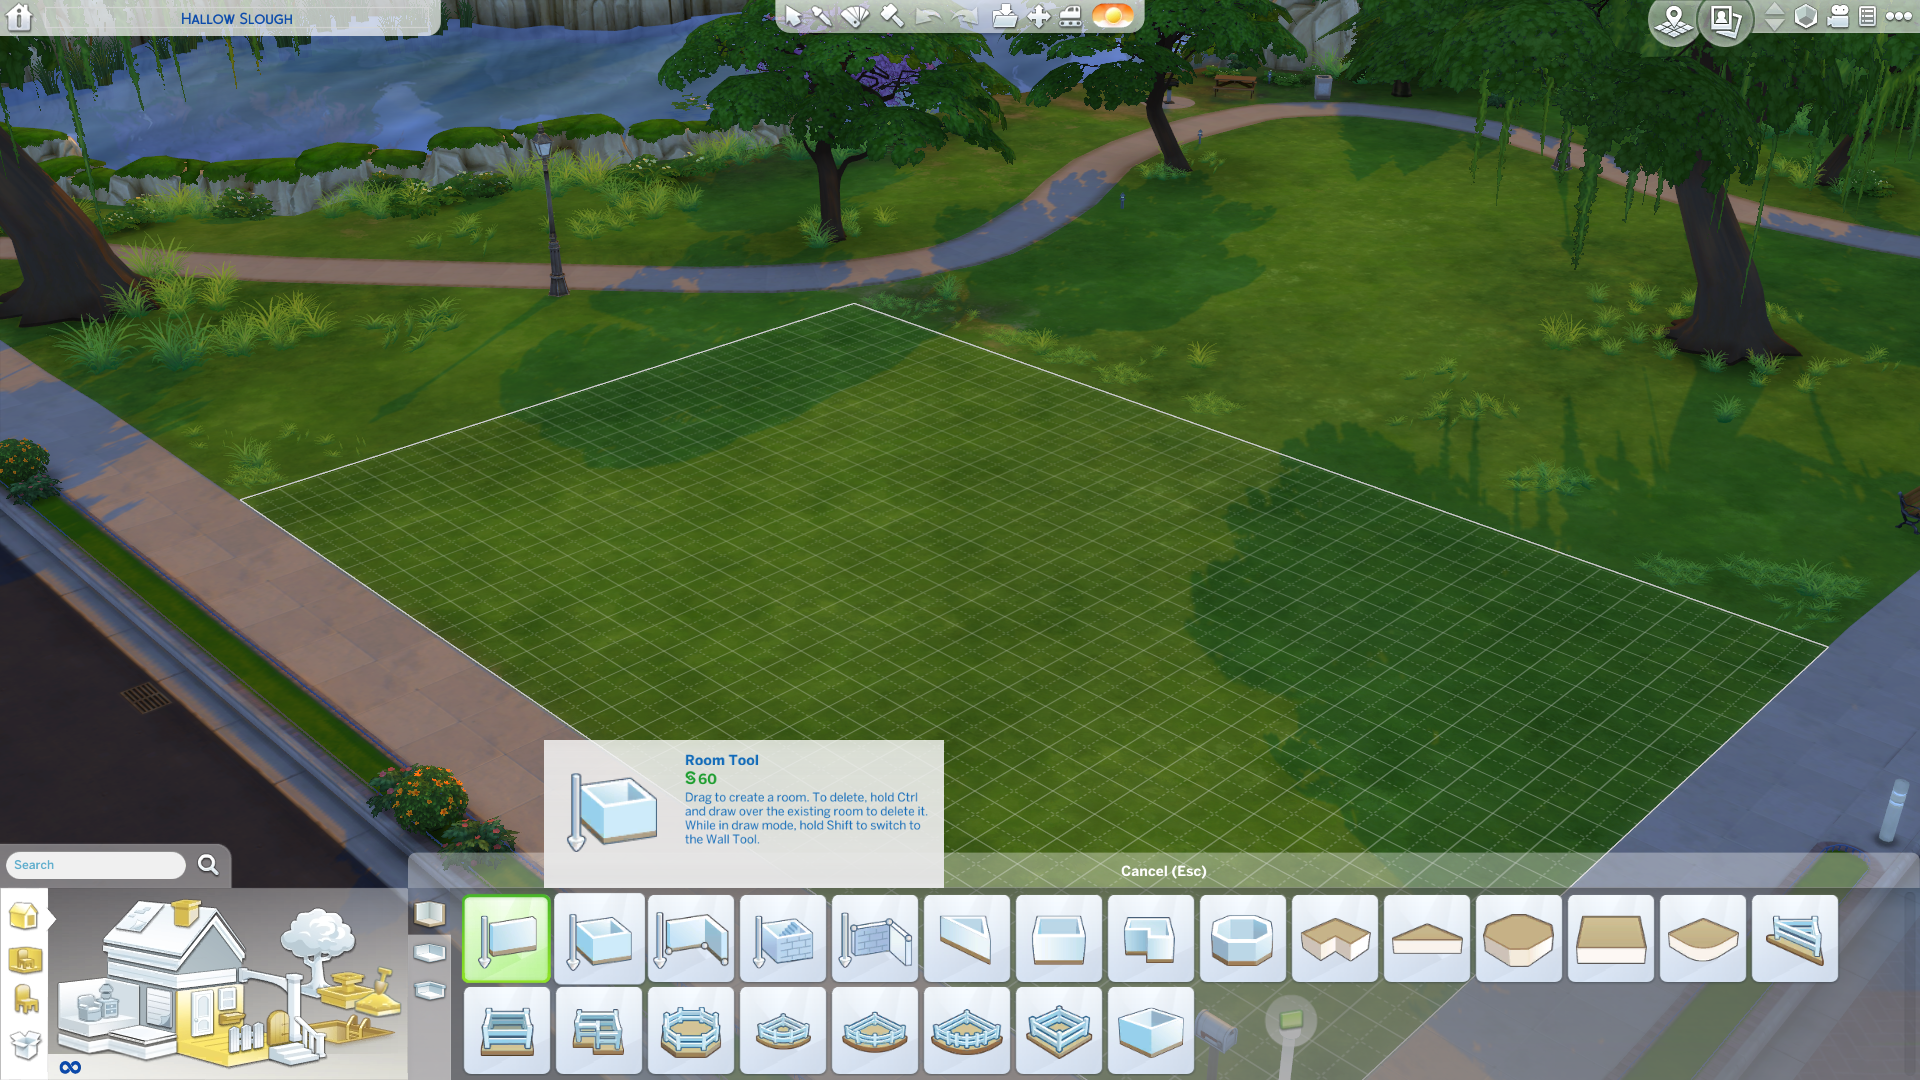
- Down the bottom left, click the build house icon
- Then click the wall outline (gold in the picture above)
- Click the room tool and then click and drag on the gride to create a square.
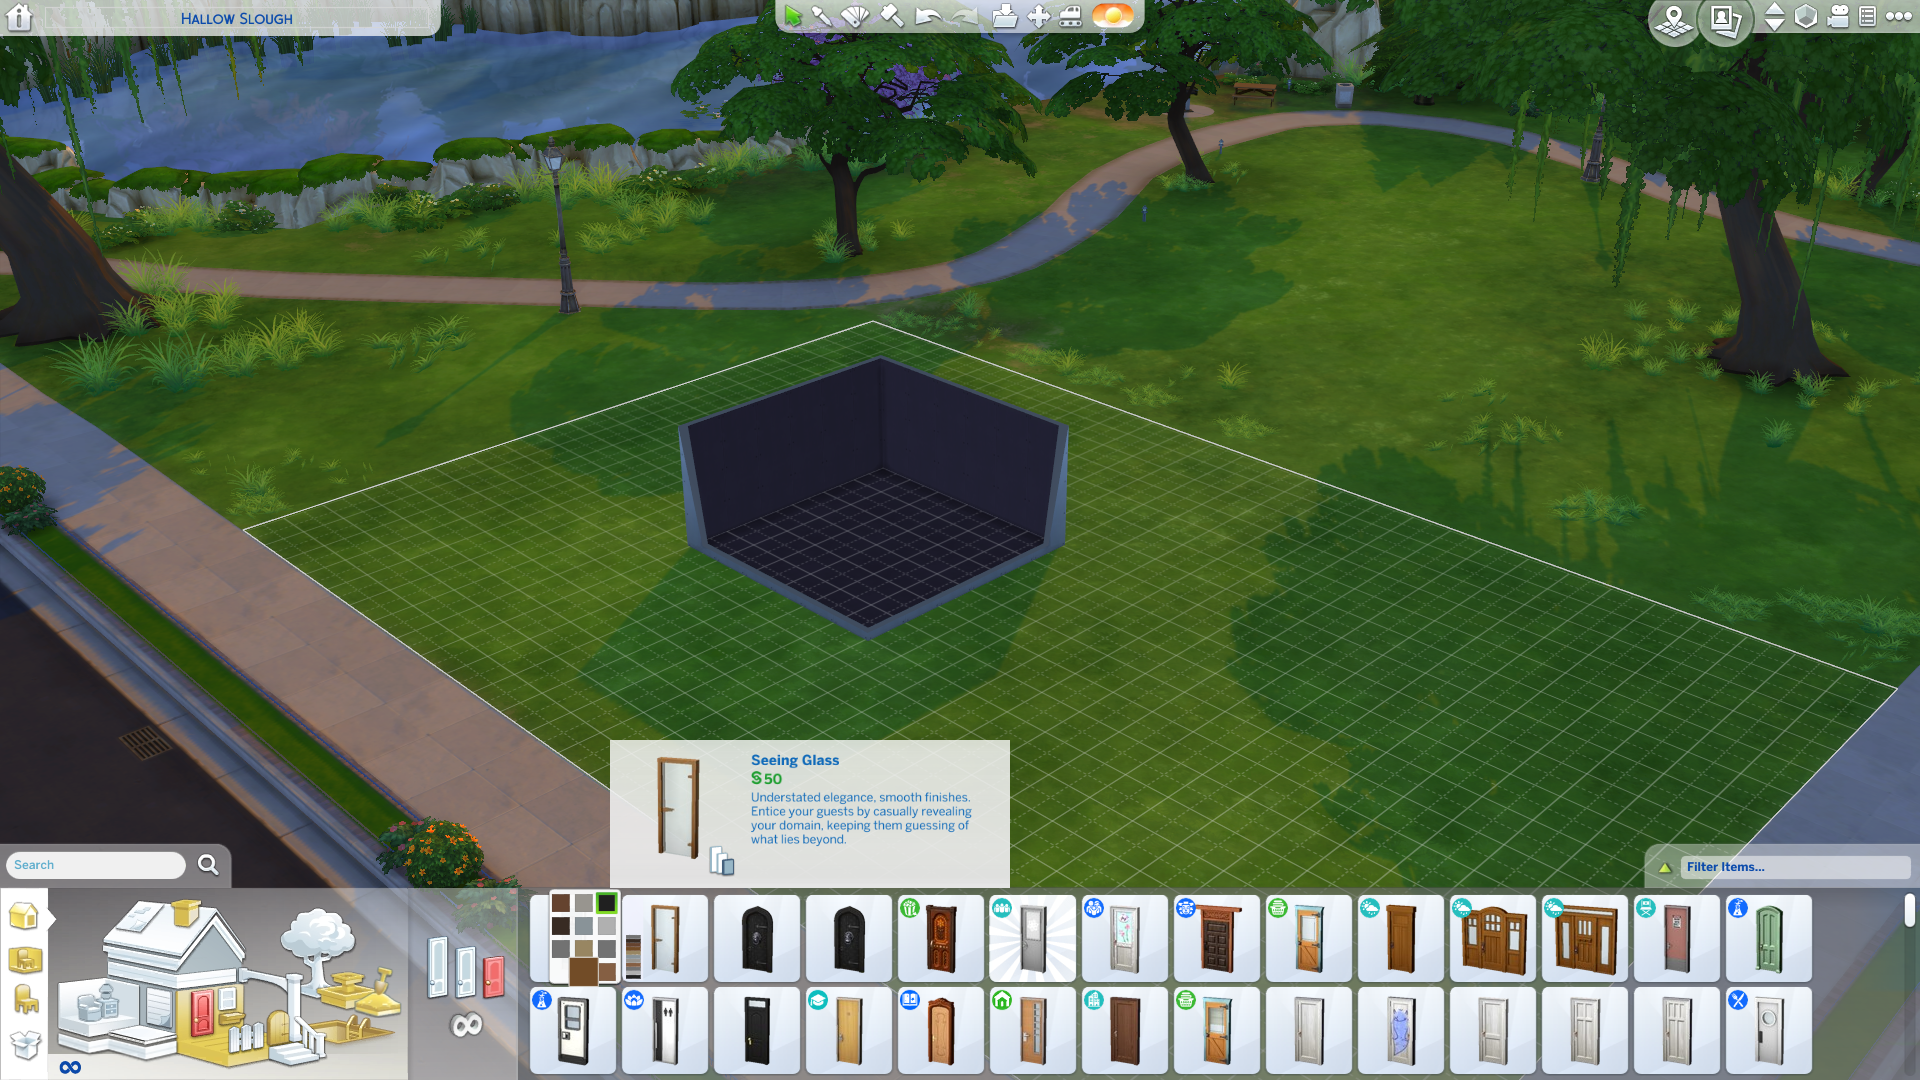
Step 2: Doors
- Next, click on door outline and click a door
- Hover over one of the walls and you will see the door snap into place
- Click to place the door, perfect!
- If you want to move the door, you can click it again to pick it up and then move it somewhere else.
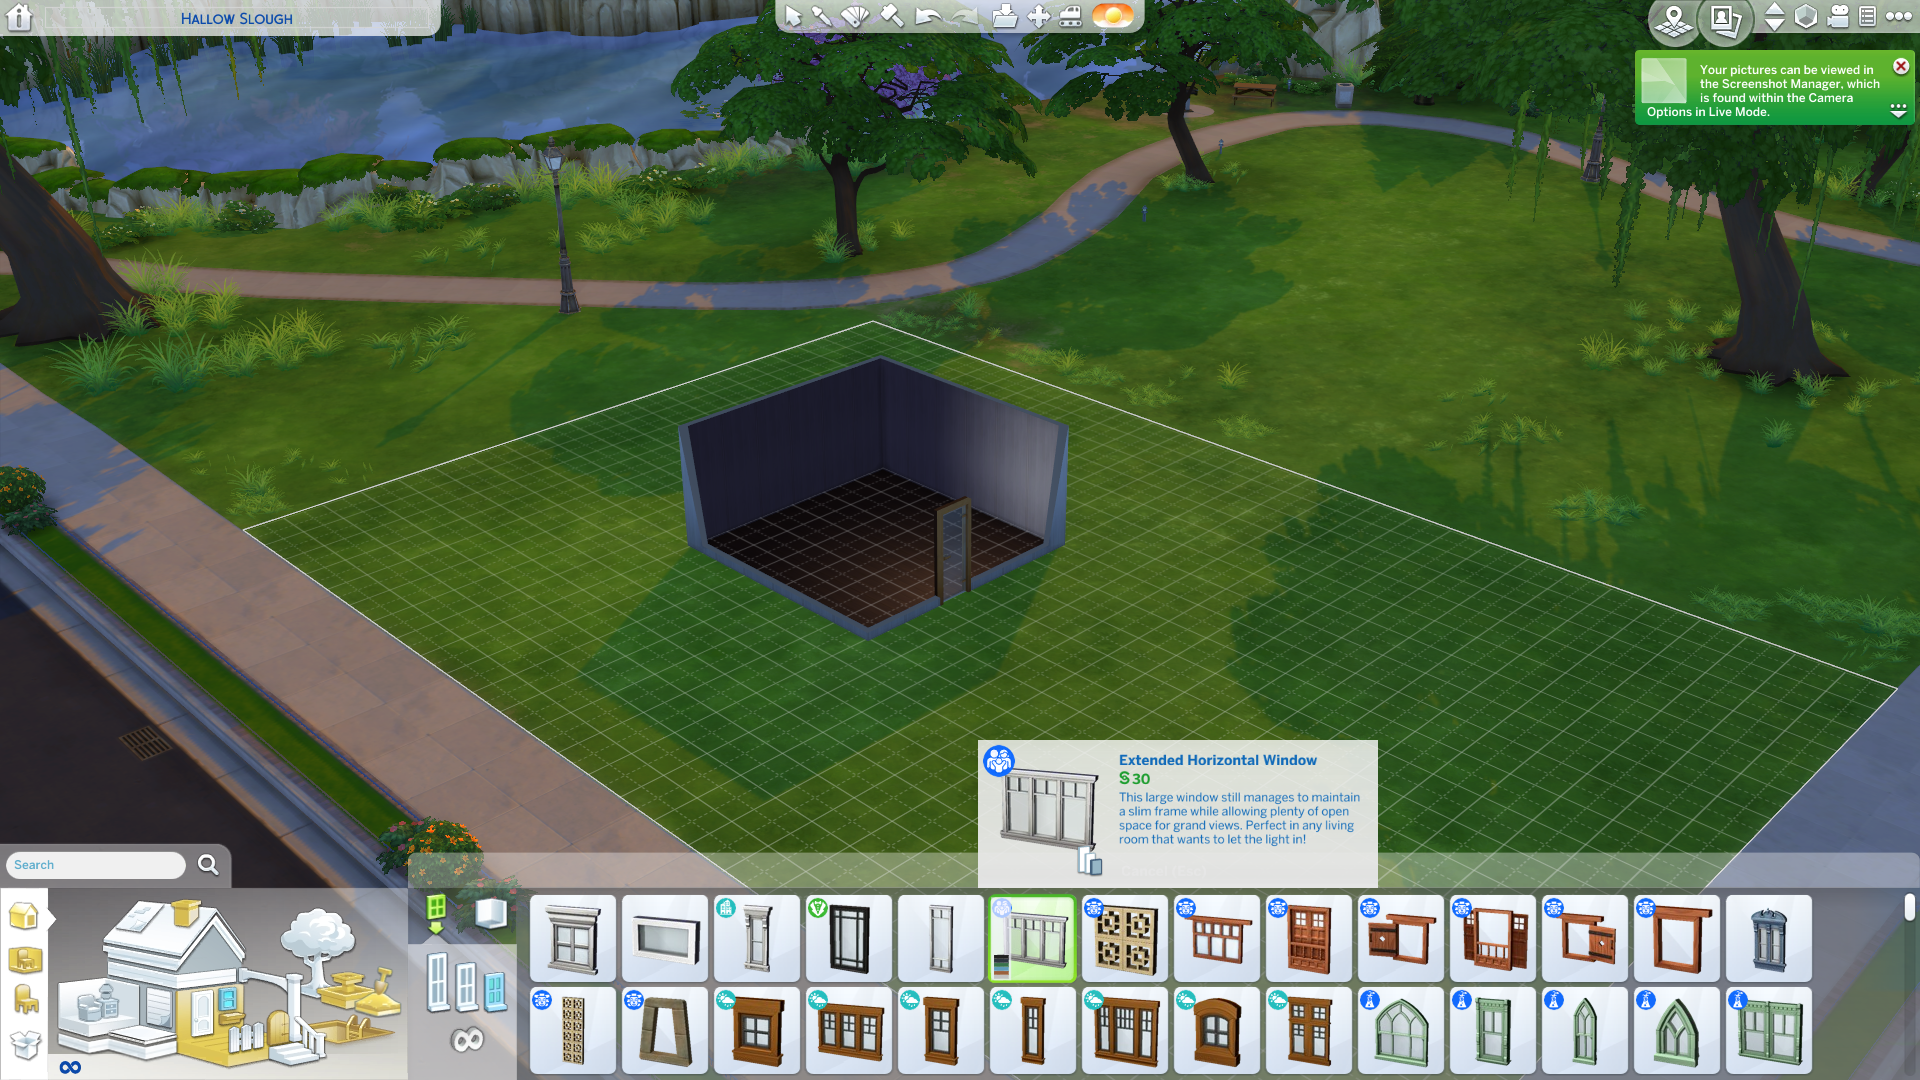
Step 3: Windows
- Just as we did with the doors, click on the windows little icon down the bottom left
- Then click on a window in the right-hand section of the objects panel
- Hover over the wall and click to place the windows
- Add as many as you like!
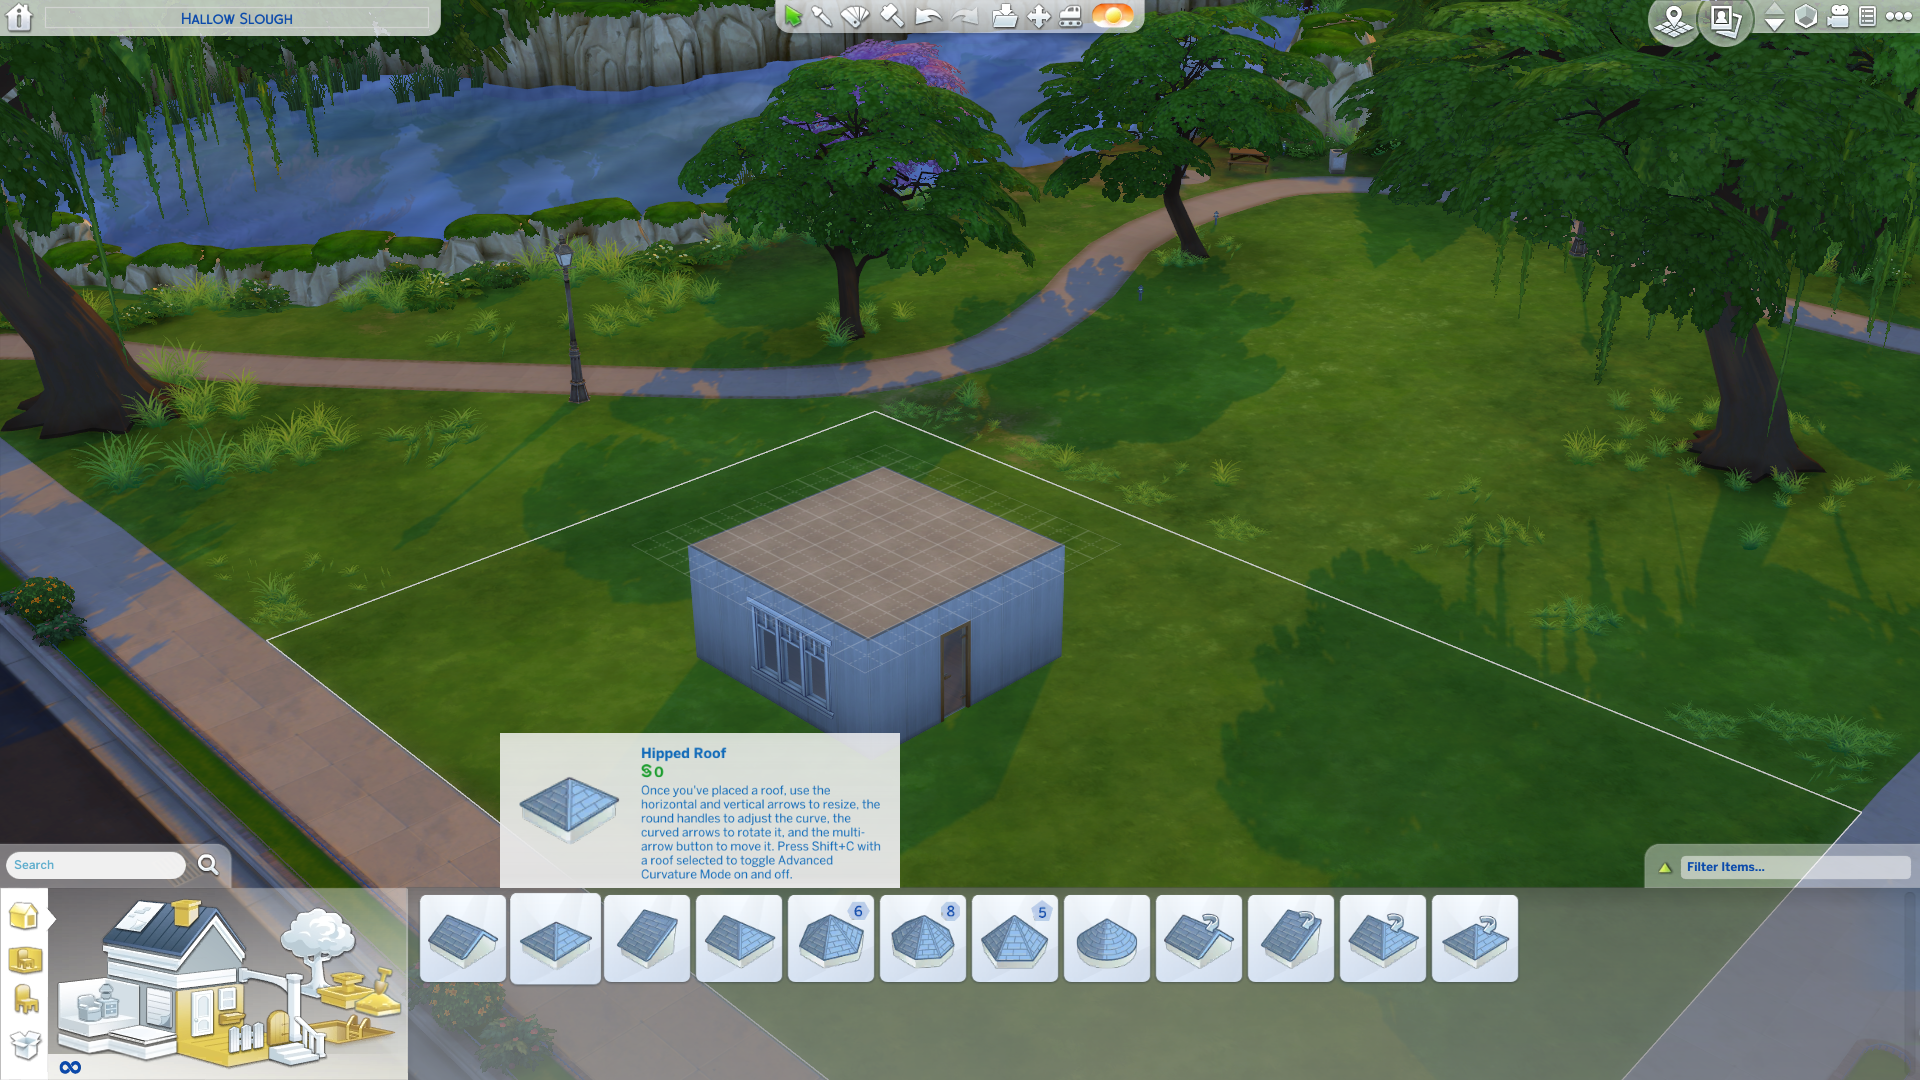
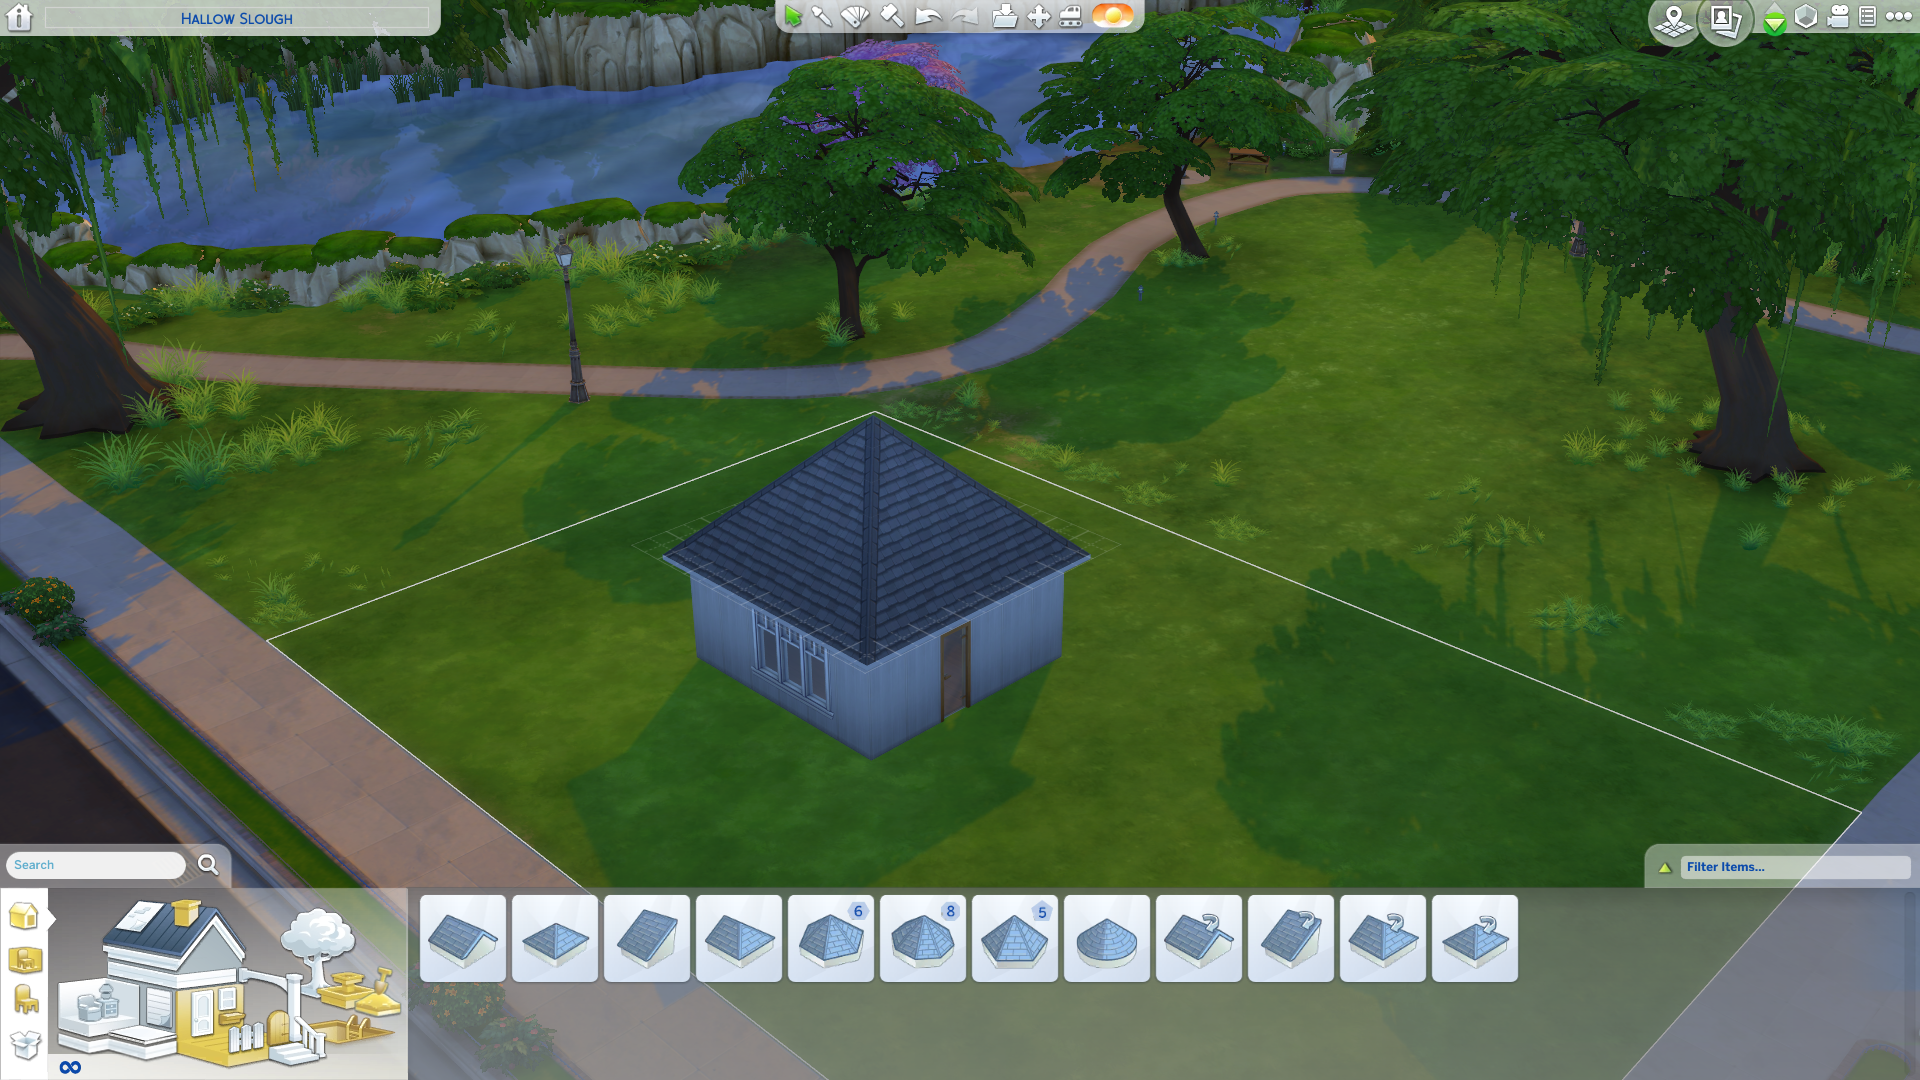
Step 4: A roof!
- First, click the up arrow at the top right of the screen.
- Then, down the bottom left click on the roof outline.
- Select the Hipped Roof (looks like a pyramid).
- Hover over the grey square and click to place the roof.
- It will look a bit small, so make sure it is selected by clicking it again.
- Use the white arrows that appear to drag the roof out, you will see a green outline appear which means it’s good to stop dragging. If you don’t see the green outline, then you aren’t able to drag the roof out that far.
Step 5: Adding some colour
For the walls, roof and floor you can add some colour to it, using paint or panelling. For each of these, there is a small square on top of each object down the bottom left as seen below.
- Next, click on one of the icons as seen above.
- Click on a floor, roof or wall texture you like the look of.
- Then, click on the roof, wall or floor depending on which texture you selected.
- For walls, you can hold shift to make it appear on all walls.
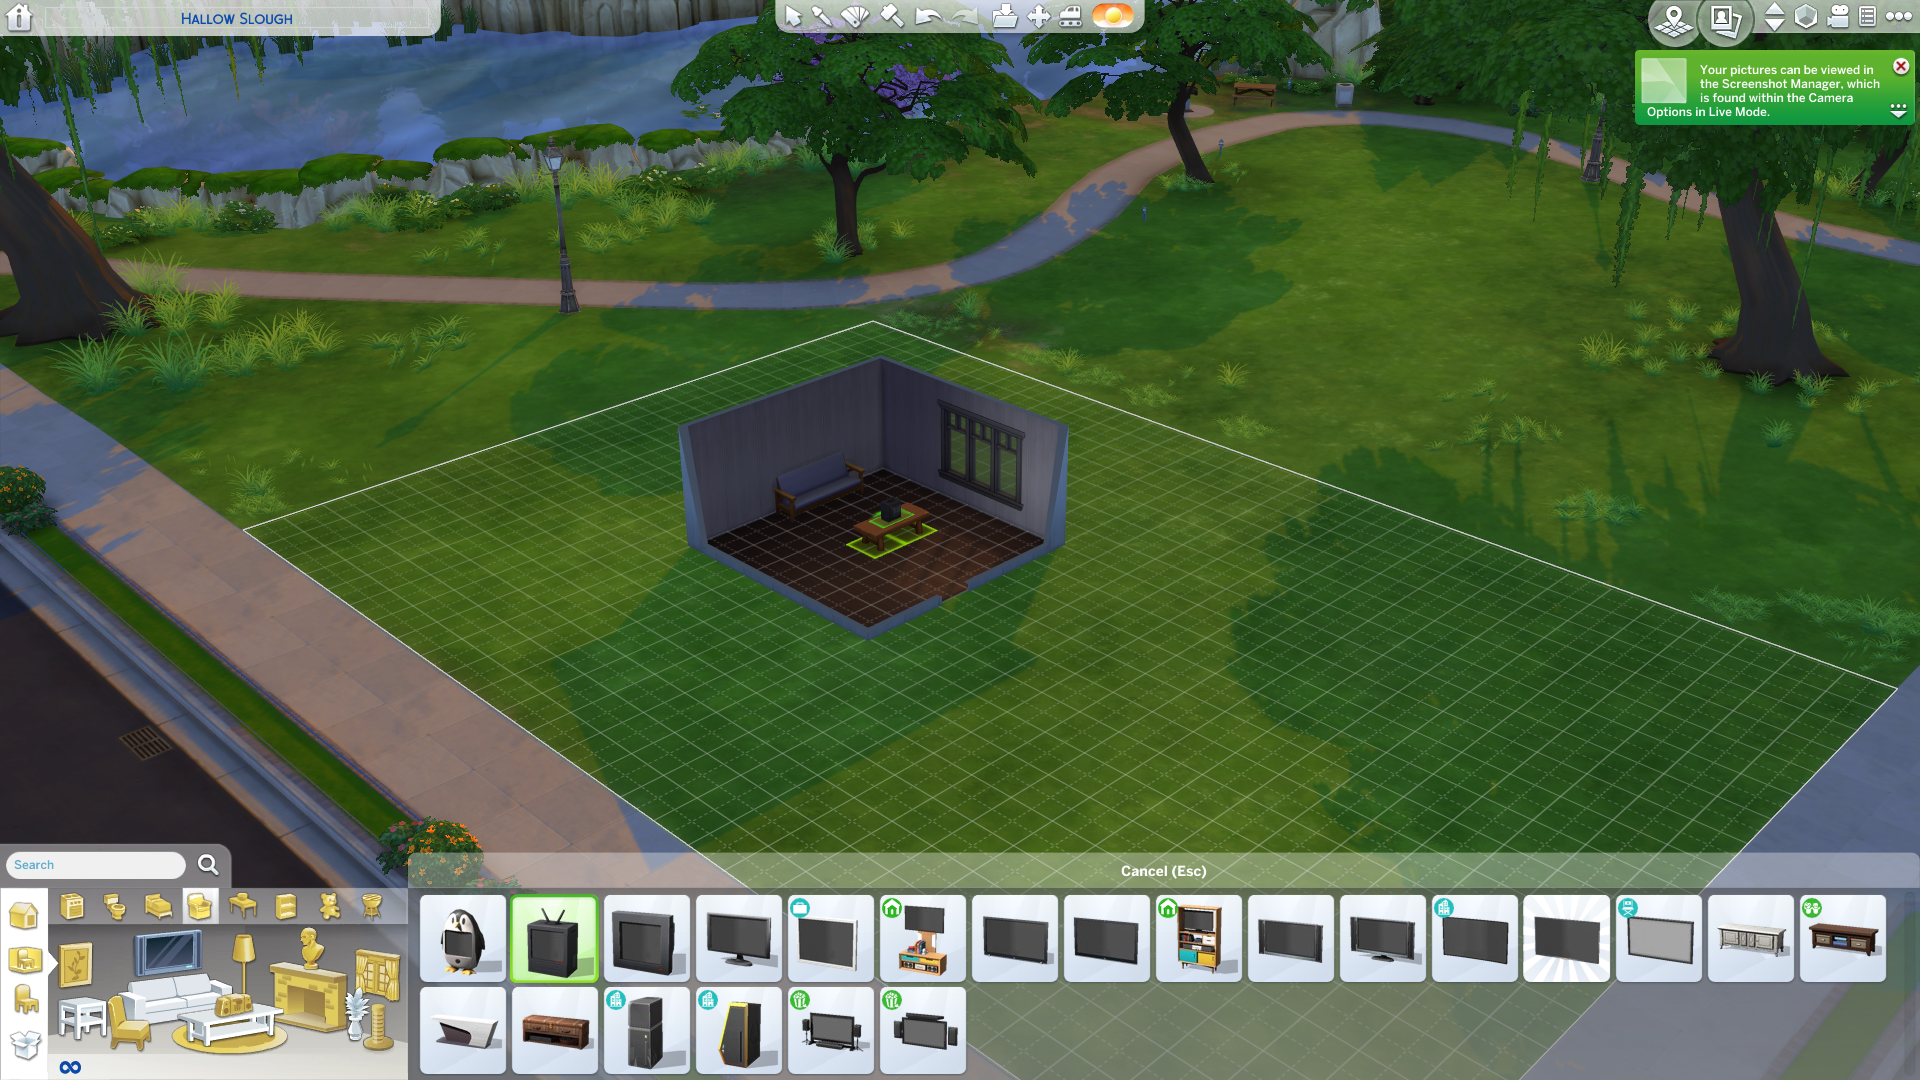
Step 6: Adding furniture to your Sims 4 build!
The final step is to add some furniture to your build.
- Click on one of the outlines of furniture down the bottom left, for example, a light.
- Then click an object you like down the bottom right of the objects panel.
- Hover inside the house you have built and then click to place the object.
- You will see a green square under the object to show it can be placed.
- In the screenshot, you will notice that you can place objects on top of other objects. If you hover a small object over surfaces like a table or kitchen worktop sometimes you can place them on top. The green square will signal if you can or not.
Sims 4 Build Mode Errors / Bugs
If you have any bugs or errors when using build mode, then I recommend restarting the Sims. This can fix most issues that occur. Another build mode error you might encounter is that build mode has disappeared. This is usually down to the fact that your Sim is in a location that can’t currently be built on or edited.
That’s it! That’s all you need to know to get started building in the Sims 4. It’s super simple but can look overwhelming initially, especially with all the tools and hotkeys.
For some more advanced tips and tricks, don’t forget to check out our YouTube channel or our sims 4 how to build a greenhouse guide.
